Predpokladám, že ani jeden z nás sa neteší do školy. Aspoň ja určite nie. No pokiaľ sa dá návrat do školských lavíc aspoň trochu spríjemniť, prečo to neurobiť? V tomto článku nájdete veci, ktoré si môžete sami vyrobiť a pomôžu vám lepšie zvládať stres v škole.
I suppose neither of us are looking forward to school. At least I don´t. But if we can return to school make a little more pleasant, why not to do it? In this article you will find things that you can make yourself and help you better deal with stress at school.
Motivačná girlanda/ Motivation garland
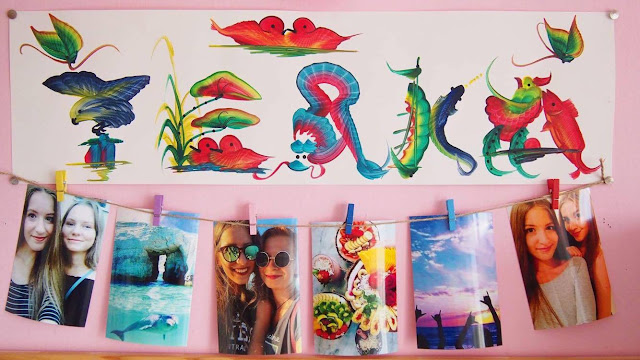
Ako prvé vám ukážem ako sa robí táto "motivačná girlanda". Je to mega jednoduché. Všetko čo budete potrebovať je motúz, malé štipčeky a fotky alebo obrázky toho čo by ste chceli v živote dosiahnuť, poprípade ľudí ktorých máte radi. Vždy keď sa budete učiť a nebude sa vám chcieť pozrite sa na vašu girlandu a spomeňte si prečo to všetko robíte :-)
The first thing I show you is how to make this "motivation garland." It's mega easy. All you'll need is a string, mini clothespins and some photos or pictures of what you want to accomplish in life, eventually the people you love. Whenever you will learn and you will want to give up, look at your garland and mention why you are doing it all :-)
To do list
Pokiaľ toho máte v škole veľa a potrebujete si to niekde zapísať, nemusíte míňať veľké peniaze na diáre. Stačí ak si to napíšete na rámik od fotografií! Bude sa nádherne vynímať na vašom písacom stolíku a bude vás tešiť, že ste si to vyrobili sami!
If you have a lot things to do for school and need to write it somwhere, you don´t need to spend big money on date labels. You only need to write it on a frame! It will stand out beautifully on your writing desk and you will be pleased that you made it yourself!
Budete potrebovať vzorovaný papier, rám na fotky, farebné pásky, ceruzku, nožnice.
You will need patterned paper, photo frame, colored tapes, pencil, scissors.
Vyberte si papier, ktorý sa vám páči najviac (môže byť aj jednofarebný, ozdobíte si ho sami).
Choose paper that you like the most (can be a single color, decorate it yourself).
Ceruzkou obkreslite rám na váš papier.
Use the pencil to trace a frame on your paper.
Vystrihnite to.
Cut it out.
Ak chcete môžete ho ozdobiť akokoľvek chcete. Ja som použila farebnú pásku.
If you want you can decorate it however you want. I used colored tape.
Papier položte do rámiku.
Put the paper into the frame.
A potom už len napíšte veci, ktoré si potrebujete zapamätať!
And then just write a things you need to remember!
Sova / Owl
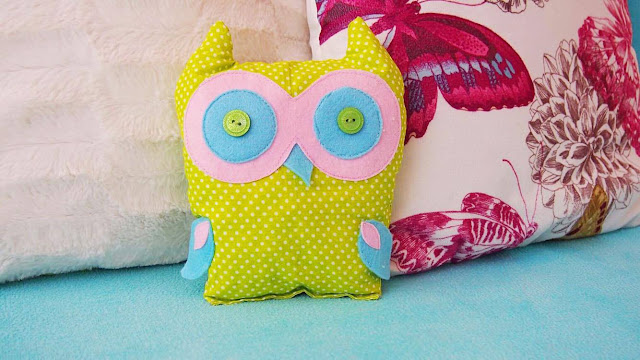
Viem, že vankúše nepatria k typickým školským veciam, ale každému dobre padne, keď sa po namáhavom školskom dni vráti domov a hodí sa na svoju milovanú posteľ. Mňa osobne farby rozveseľujú, a preto som sa rozhodla ukázať vám ako sa robia tieto roztomilé vankúše, na ktorých si môžete po škole oddýchnuť.
I know that pillows are not part of a typical school stuff, but everyone feels good when returnes home and drop into beloved bed after a busy school day. Personally, colors make me cheerful and so I decided to show you how to make these cute pillows on which you can relax after school.
Budete potrebovať látku, filc troch rôznych farieb, gombíky, nite, náplň do vankúšov.
You will need fabric, felt of three different colors, buttons, threads, filling to pillows.
Ako prvé si nakreslite tvar sovy na látku z opačnej strany.
First, draw the shape of an owl on the fabric from the opposite side.
Pred strihaním látku zaistite špendlíkmi aby sa látka neoddeľovala a vystrihnuté strany boli rovnako veľké.
Secure fabric with a pins so fabric won´t separate and the cut out fabrics will be the same size.
Vystrihnite sovu z látky
Cut out an owl from the fabric.
Látku zošite len z jednej strany, aby ste ju neskôr mohli plniť náplňov na vankúše.
Sew the fabric only at one side so you can fill an owl with the filling to pillows.
Potom požite jeden z filcov a nakreslite oči a vystrihnite ich.
Then, use one of the felts and draw an eyes. Cut it out.
Na druhý filc nakreslite menšie kruhy ako súčasť očí.
On the other felt draw the eyes.
Potom vystrihnite krídla a zobák. Vystrihnuté veci priložte na látku spolu s gombíkmi aby ste videli kde to máte šiť.
Then, cut out the wings and beak. Cut things attach to the fabric together with the buttons to see where you will sew.
Najskôr zašite oči, zobák a krídla.
First, sew the eyes, beak and wings.
Potom, ich prišite k látke.
Then, sew it into the fabric.
Nakoniec, vyplňte sovu a prišite oči.
Finally, fill the owl and sew in buttons.
Rovnakým spôsobom môžete vytvoriť aj iné zvieratká :-)
In the same way, you can also create other animals :-)
Jednorožec / Unicorn
Budete potrebovať obliečku na vankúš, papier s jednorožcom, farbu na textil, špongiové štetce, lepiacu pištoľ, pom poms. lepiace pásky
You will need a pillowcase, unicorn paper, textile color, sponge brushes, glue gun, pom poms. sticky tapes.
Ako prvé, nájdite na internete (alebo v časopise) obrázok jednorožca, vytlačte ju a vystrihnite
First, find on the internet (or magazine) picture of unicorn, print it and cut it out.
Položte šáblonu na obliečku a zaistite ju lepiacimi páskami.
Place your stencil on the pillowcase and fix it by sticky tapes.
Teraz môžete začať farbiť jednorožca. Dávajte si pozor aby ste nezašli na kraje šablóny.
Now you can begin to color the unicorn. Be careful that you are not going behind the edges of the stencil.

Potom odstráňte šablónu. Odstráňte ju kým je mokrá, pretože keď sa vysuší môže sa olupovať.
Then, you can remove the stencil. Remove it while it´s still wet because if you let it dry it might peel off.
Nakoniec už len pridajte pom pom guličky! :-)
Finally, just add the pom poms! :-)
Mimochodom, dva z týchto výrobkov sú inšpirované od mojej obľúbenej youtuberky. Uhádnete, ktoré?
By the way, two of this products are inspired by one of my favourite youtubers. Can you guess which one?


Skvělé nápady! :)
ReplyDeleteĎakujem! :*
Delete